Introduction
Benefits of RV Solar
RV Solar Power - The System Demystified
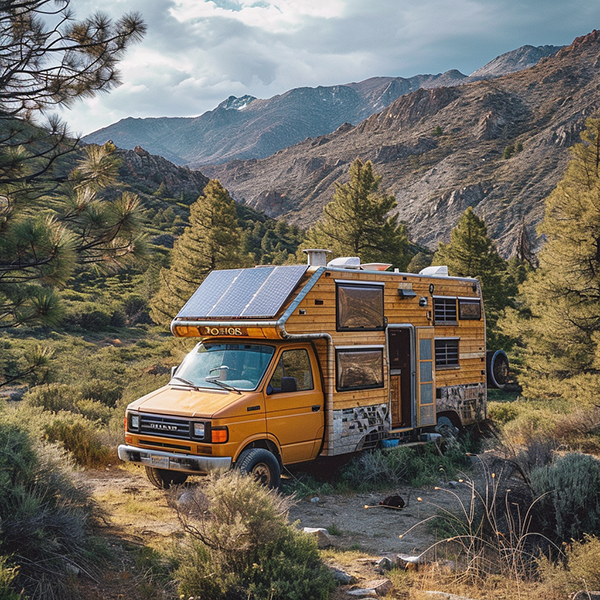
Solar Panels (Photovoltaic Modules): These are the primary components responsible for converting sunlight into electricity. Mounted on the roof of the RV, solar panels generate DC (direct current) electricity when exposed to sunlight.
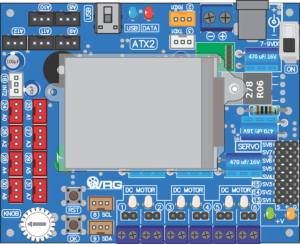
Charge Controller: The charge controller is a crucial component that regulates the voltage and current from the solar panels to prevent overcharging and damage to the batteries. It ensures that the batteries receive an optimal charge without being overcharged or discharged excessively.
Battery Pack: Solar power systems on RVs typically include a battery pack to store excess energy generated by the solar panels. Deep-cycle batteries, such as lead-acid or lithium-ion batteries, are commonly used to store DC power for later use, especially during periods of low sunlight.
AC/DC Inverter: The inverter is responsible for converting DC power stored in the batteries into AC (alternating current) power, which is used to run standard household appliances and devices inside the RV. Inverters come in various sizes and types, including pure sine wave and modified sine wave inverters.
AC Power Draw Examples: Appliances like the refrigerator and microwave fall under the category of AC power draw. The inverter converts solar-generated DC power into AC power, allowing these appliances to operate.
DC Power Draw Examples: Components such as RV cameras and screens are examples of DC power draw. These devices operate on the DC power supplied by the batteries, contributing to a more energy-efficient setup.
Installation of an RV Solar Power System
Installing the RV Solar Panels
Installing RV solar panels can be relatively straightforward, especially with the availability of solar kits designed for RV use. Here’s a general guide on how the installation process is done:
Gather Necessary Tools and Materials:
- Solar panels and mounting brackets
- Charge controller
- Inverter (if using AC appliances)
- Battery bank
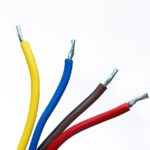
- Wiring and connectors
- Drill and screwdriver
- Sealant (for roof-mounted panels)
- Mounting hardware
Plan the Installation:
- Determine the ideal placement of solar panels based on sun exposure, roof space, and aesthetics.
- Plan the wiring route from the panels to the charge controller and battery bank.
Install Solar Panels:
- Roof-Mounted Panels:
- Securely mount panels using brackets, ensuring they are evenly spaced and well-attached to the roof.
- Drill holes for wiring and use sealant to prevent leaks.
- Connect panels in series or parallel, depending on the system requirements.
- Portable Panels:
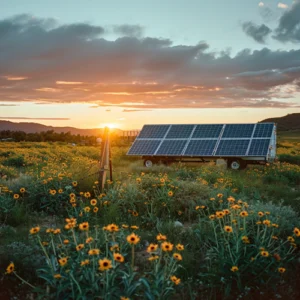
- Set up portable panels on the ground in a location with optimal sun exposure.
- Connect portable panels to a charge controller using appropriate wiring.
Install Charge Controller
Connecting the charge controller in an RV solar power system is a critical step to regulate the flow of electricity from the solar panels to the battery bank. Here’s a guide on how to connect the charge controller:
Choose a Suitable Location:
- Mount the charge controller in a location that is easily accessible and well-ventilated.
- Ensure it is close to the battery bank to minimize wiring length.
Disconnect Power Sources:
- Before connecting anything, ensure that the solar panels and battery bank are disconnected from the system to prevent accidents.
Identify Charge Controller Terminals:
- The charge controller will have clearly labeled terminals for connecting solar panels, batteries, and possibly an inverter (if applicable).
- Common terminals include “Solar In” for solar panels, “Battery” for the battery bank, and “Load” for the load or inverter.
Connect Solar Panels:
- Connect the positive (+) and negative (-) wires from the solar panels to the corresponding terminals on the charge controller.
- Follow the provided instructions to ensure proper polarity.
Connect Battery Bank:
- Connect the positive (+) and negative (-) wires from the battery bank to the “Battery” terminals on the charge controller.
- Again, ensure correct polarity, and follow the charge controller’s instructions for multiple battery connections.
Connect Load or Inverter (if applicable):
- If your system includes an inverter or a load, connect its positive (+) and negative (-) wires to the “Load” terminals on the charge controller.
- Ensure proper polarity and follow the device’s instructions.
Double-Check Connections:
- Carefully review all connections to confirm that the wires are securely attached and that there are no loose or exposed wires.
- Check that the polarity is correct for all connections.
Turn On the Charge Controller:
- Once all connections are secure, you can turn on the charge controller. Some models may have a switch, while others may turn on automatically.
Monitor the Charge Controller:
- Keep an eye on the charge controller’s display or indicators to ensure that it is functioning properly.
- Verify that it is regulating the charging process and preventing overcharging of the battery bank.
Ensuring Proper Wiring
 Follow Manufacturer’s Instructions:
- Always refer to the manufacturer’s instructions for your solar panels, charge controller, and other components.
- Adhere to the recommended wire sizes, types, and configurations specified in the instructions.
Use Correct Wire Sizes:
- Choose wire sizes based on the distance between components and the current capacity required.
- Larger wire gauges may be needed for longer distances to minimize power loss.
Ensure Polarity Consistency:
- Maintain consistency in polarity throughout the entire system to prevent damage to components.
- Positive and negative connections should match between solar panels, charge controller, batteries, and inverter.
Secure and Protect Wiring:
- Secure all wiring using appropriate clamps, zip ties, or conduit to prevent damage from vibrations or exposure.
- Protect wiring from environmental elements, such as UV rays and moisture, by using weatherproof conduits or coverings.
Avoid Sharp Bends and Kinks:
- Avoid sharp bends and kinks in the wiring, as these can lead to increased resistance and reduced efficiency.
- Use gradual bends and ensure a smooth path for the wires.
Implement Proper Grounding:
- Follow proper grounding procedures as specified by the manufacturer and electrical codes.
- Grounding is essential for safety and helps prevent electrical issues.
Ensuring Component Mountings:
Secure Solar Panels:
- Mount solar panels securely on the roof of the RV using appropriate brackets or mounts.
- Ensure a solid connection to prevent movement or detachment during travel.
Position for Maximum Sun Exposure:
- Choose a mounting location that maximizes sun exposure throughout the day.
- Adjust the tilt and orientation of solar panels based on the RV’s parked location and time of year.
Ventilation for Charge Controller:
- Mount the charge controller in a well-ventilated location to prevent overheating.
- Allow for proper airflow around the charge controller to maintain optimal performance.
Secure Battery Mounting:
- Securely mount the batteries in a designated compartment or area within the RV.
- Use battery mounts or brackets to prevent movement during travel.
Inverter Placement:
- If using an inverter, mount it in a well-ventilated and easily accessible location.
- Ensure that the inverter is securely fastened to prevent damage from vibrations.
Regularly Inspect and Maintain:
- Periodically inspect all mounts and connections for signs of wear or damage.
- Tighten any loose bolts or brackets and address issues promptly.
Inspection and Maintenance Tips for your RV Solar System
Regular Panel Inspection and Maintenance
Visual Inspection: Conduct regular visual inspections of the solar panels to check for any visible damage, cracks, or signs of wear.
Look for accumulated dirt, debris, or bird droppings that may affect performance.
Clean Panels: Clean the solar panels regularly to remove dust, pollen, and other debris that can reduce efficiency.
Use a soft brush, mild detergent, and water to gently clean the surface of the panels.
Check for Shading: Ensure that there are no obstructions casting shadows on the solar panels.
Trim nearby branches or foliage that might shade the panels, especially during peak sunlight hours.
Inspect Wiring and Connections: Examine all wiring and connections for signs of wear, loose connections, or corrosion.
Tighten any loose connections and address any issues promptly.
Monitor Output: Use a solar charge controller or monitoring system to track the output of the solar panels.
Monitor any fluctuations or drops in performance that may indicate a problem.
Ensure Tilt and Orientation: Check the tilt and orientation of the solar panels to ensure they are optimized for sun exposure.
Adjust the tilt angle seasonally if your mounting system allows for it.
Examine Mounting Hardware: Regularly inspect the mounting hardware for tightness and stability.
Tighten bolts and brackets as needed to prevent movement during travel.
Check for Hail Damage: After severe weather events, inspect the solar panels for any potential hail damage.
Hail impacts may cause visible cracks or dents on the surface.
Inspect Charge Controller:
If you have a solar charge controller, check its status and settings regularly.
Ensure that the charge controller is functioning correctly and adjusting charge levels appropriately.
Battery Maintenance:
If your RV solar power system includes batteries, follow proper maintenance procedures for the battery bank.
Check battery fluid levels, ensure proper ventilation, and monitor overall battery health.
Professional Inspection: Consider scheduling periodic professional inspections to assess the overall condition of the solar power system.
Professionals can identify potential issues and provide recommendations for improvements.
By incorporating these routine inspections and maintenance practices, you can maximize the longevity and efficiency of your RV solar panels.
A proactive approach to maintenance ensures that your solar power system continues to provide reliable and sustainable energy for your RV adventures.
Expert Tips for Optimizing RV Solar Power
Efficient Appliance Selection: Choose energy-efficient appliances for your RV to minimize power consumption.
Opt for RV-specific appliances designed for solar setups.
LED Lighting: Replace traditional bulbs with energy-efficient LED lighting to reduce power usage.
LEDs consume less energy and provide ample illumination.
Use Solar Generators: Consider portable solar generators for additional power during cloudy days or high energy demand.
These generators can supplement your solar panel output.
Invest in High-Quality Batteries: Choose deep-cycle batteries with high energy storage capacity for your solar system.
Quality batteries ensure reliable power storage.
Energy-Efficient Electronics: Select energy-efficient electronics, such as low-power laptops and devices.
Charge electronic devices during daylight hours to utilize solar power.
Regular Panel Tilt Adjustments: Adjust the tilt angle of your solar panels seasonally to optimize sun exposure.
Winter angles differ from summer angles for maximum efficiency.
Monitor Power Consumption: Use a power monitoring system to track energy consumption in real-time.
Identify and address any high-power-consuming devices.
Invest in a Solar Charge Controller: A quality solar charge controller regulates the charging process, preventing overcharging or undercharging.
Choose a controller suitable for your battery type.
Temperature Considerations: Be mindful of temperature effects on battery performance.
Ensure proper ventilation and cooling to maintain battery efficiency.
Keep Panels Clean: Regularly clean solar panels to maximize light absorption.
A clean surface improves overall solar panel efficiency.
Educate Yourself: Stay informed about advancements in solar technology and RV solar systems.
Attend workshops or seek advice from experts to enhance your knowledge.
Emergency Preparedness: Have a backup power plan for emergencies, such as a generator or additional battery capacity.
Be prepared for unforeseen situations where additional power may be required.
Weight Considerations: Opt for lightweight solar panels to minimize the impact on your RV’s overall weight.
Consider flexible and portable solar panel options.
Professional Consultation: Consult with RV solar experts for personalized advice based on your specific setup.
Professionals can help optimize your system for maximum efficiency.
Implementing these expert tips can significantly enhance the performance and efficiency of your RV solar power system, providing a reliable and sustainable power source for your travels.
Conclusion
Navigating the Solar-Powered Road Ahead
In conclusion, venturing into the world of RV solar power offers a myriad of benefits that extend beyond energy savings. From the eco-friendly allure of harnessing the sun’s power to the freedom of an independent and sustainable RV lifestyle, solar technology revolutionizes the way we explore the open road. Throughout this comprehensive guide, we delved into the various components that constitute a robust RV solar system, empowering you with the knowledge needed to harness the sun’s energy for your travels.
Recapping the advantages of RV solar power, we’ve explored the financial savings, environmental friendliness, and increased energy independence that come with embracing solar technology on your RV. The components, including solar panels, charge controllers, batteries, and inverters, collectively form a reliable and efficient power system tailored for life on the road.
As we encourage RV enthusiasts to embrace the transformative potential of solar power, we highlight the growing community of solar-powered travelers contributing to a more sustainable and eco-conscious nomadic lifestyle. The call to action resonates with those seeking not only the freedom to roam but also a commitment to minimizing their environmental footprint.
Embarking on the road with solar power isn’t just a journey; it’s a commitment to a greener and more self-reliant way of life. With advancements in solar technology and a wealth of resources available, the possibilities for optimizing your RV solar system are endless. As you navigate the solar-powered road ahead, may your RV adventures be illuminated by the inexhaustible power of the sun, providing a sustainable and eco-friendly path to wherever your travels take you. Safe and sun-powered travels on the open road!


