IF IT GOES ... IT'S VEHICULAR
How to Change Brake Pads: 13 Foolproof Steps
Learning how to change brake pads is the repair that turns the most people into lifelong DIYers. The parts are cheap, the tools are basic, a shop charges $150 to $300 an axle for it, and the whole job is visible and mechanical. Nothing is hidden and nothing requires a computer. Here is how to change brake pads correctly, in 13 steps, including the details that separate a job that works from a job that squeals, pulls, or wears out early.
One thing first. If you are not sure the pads are actually due, measure before you buy. Pads have wear indicators and minimum thickness specs, and the companion piece on how long brake pads last covers how to read what is left on yours.
Ceramic, Semi-Metallic, or Organic: Which Pads to Buy
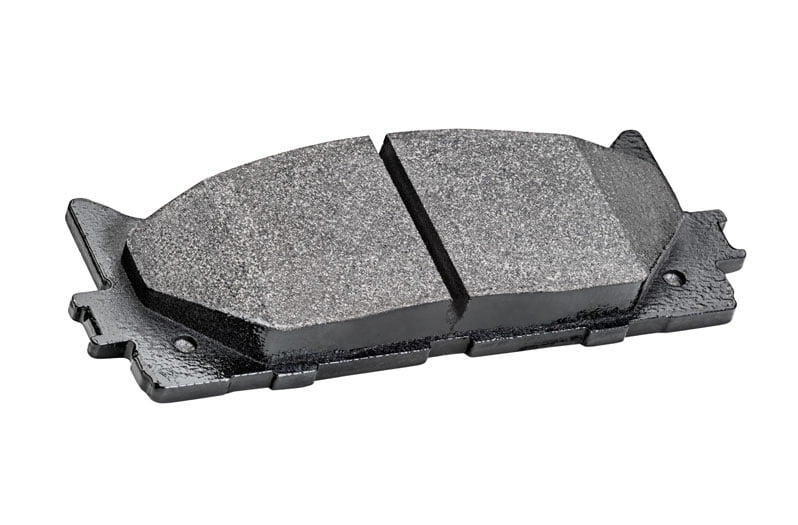
Before you learn how to change brake pads, you have to buy the right ones, and the pad aisle offers three materials. Ceramic pads are quiet, low-dust, and easy on rotors, which makes them the default for commuter cars and anything with nice wheels you are tired of cleaning. Semi-metallic pads bite harder, handle heat better, and wear rotors faster, which is why trucks that tow and drivers who work their brakes hard should lean that way. Organic pads are the budget option: quiet and gentle but soft, fading sooner under heat and wearing fastest of the three.
Match the material to the duty. A half-ton truck that pulls a travel trailer through hills wants semi-metallic or a towing-rated ceramic, not the quietest pad in the store. A commuter sedan wants ceramic and will reward you with clean wheels and 50,000 quiet miles. When in doubt, match or exceed the material that came on the vehicle from the factory, because the engineers sized the system around it.
How to Change Brake Pads in 13 Steps
Step 1: Gather Tools and Parts
You need a lug wrench, a floor jack, jack stands, a socket set, a C-clamp or caliper piston tool, brake cleaner, a small packet of brake grease, and the correct pads. Look up pads for your exact vehicle on Amazon and buy a known brand. The $18 no-name pads are how you end up doing this again in a year.
Step 2: Loosen the Lug Nuts on the Ground
Break each lug nut loose a quarter turn while the tire still touches pavement. With the wheel in the air, it just spins against the wrench.
Step 3: Lift the Vehicle and Set Jack Stands
Jack at the factory lift point, set a jack stand under a frame or pinch-weld point, and lower the vehicle onto the stand. The jack holds nothing once the stand is set. Never put any part of yourself under a vehicle held only by a jack.
Step 4: Remove the Wheel
Spin the loosened lugs off, pull the wheel, and lay it flat under the car near the jack stand as a backup layer of protection.
Step 5: Remove the Caliper
Two slide pin bolts on the back of the caliper, usually 13mm or 14mm. Remove them, work the caliper off the rotor, and hang it from the strut spring with a hook or zip tie. Never let it dangle by the rubber brake hose, because that hose is what stops the car.
Step 6: Pull the Old Pads and Inspect
This step is where how to change brake pads becomes as much inspection as replacement. The pads slide or clip out of the bracket. Look at how they wore before you toss them. Even wear on both pads is normal. One pad worn far more than the other means sticking slide pins, and inner-edge taper means the caliper needs attention, not just pads. Check the rotor surface too. Deep grooves or a pronounced lip mean rotors should be replaced or machined while you are in here.
Step 7: Compress the Caliper Piston
Crack the master cylinder reservoir cap open, place the old pad against the piston, and squeeze it back into its bore slowly with the C-clamp. Watch the reservoir, because fluid returns as the piston retracts. On many vehicles with electronic parking brakes, the rear pistons must be wound back or retracted in service mode, so check your manual before forcing anything.
Step 8: Install the New Pads
Swap over any shims and wear clips, put a thin film of brake grease on the pad backing plates and the contact ears where the pads ride in the bracket, and seat the new pads. Nothing greasy ever touches the friction surface or the rotor face.
Step 9: Reinstall the Caliper
Lower the caliper over the new, thicker pads, clean and grease the slide pins, and torque the caliper bolts to spec. Snug is not a spec. Brake hardware gets a torque wrench.
Step 10: Remount the Wheel
Wheel on, lug nuts started by hand and run down snug in a star pattern.
Step 11: Lower the Vehicle
Jack up slightly, pull the stand, lower the car all the way to the ground.
Step 12: Torque the Lug Nuts
Final tighten in a star pattern with a torque wrench to your vehicle’s spec, typically 80 to 140 lb-ft, which your owner\u2019s manual or the NHTSA brake safety guidance will confirm. Guessed lug torque is how rotors warp and studs snap.
Step 13: Pump the Pedal Before You Drive
The pedal goes to the floor on the first push, and knowing this is part of knowing how to change brake pads. It is normal. It is also why this step is not optional. Pump until the pedal is firm, top off the reservoir, then drive gently and make a series of moderate stops from about 30 MPH to bed the new pads into the rotors. No panic stops for the first hundred miles if you can help it.
If Something Is Wrong After the Job
Knowing how to change brake pads includes knowing what the noises mean afterward. Squealing after a pad change is usually missing or dry hardware: shims left off, contact points not greased, or wear clips from the old pads reused when new ones came in the box. A grinding noise means something is contacting the rotor that should not be, and the wheel comes back off now. A soft pedal that pumps up firm points at air or at a piston not fully seated. A pull to one side means one caliper is not clamping, usually from a sticking slide pin that should have been cleaned and greased during the job.
Vibration under braking that appears in the first week is almost always improper bedding or a spot of grease or fingerprint oil on the rotor face, not warped rotors. Clean the rotors with brake cleaner, re-bed the pads properly, and it usually resolves. None of these problems means the job was beyond you. They mean one detail got skipped, and every one of them is fixable in the driveway with the same tools you already used.
How Often You Will Do This Job
Front pads carry most of the braking load and typically last 30,000 to 60,000 miles. Rears last longer on older vehicles, though on many modern cars with electronic brake distribution the rears actually wear faster, which surprises people replacing pads on a five-year-old vehicle for the first time. Towing, hills, and city stop-and-go all shorten the interval, and highway miles stretch it. The full breakdown of intervals, wear indicators, and minimum thickness specs is in the companion article on how long brake pads last. Check the pads every tire rotation, and now that you know how to change brake pads yourself, the schedule takes care of itself.
Pads, Rotors, or Both
The most common question after learning how to change brake pads is whether the rotors should go too, because how to change brake pads and when to change rotors are separate decisions. The honest answer: measure and look. A rotor above its minimum thickness spec, with a smooth face and no blue heat spots or deep grooves, can take a second set of pads. A rotor with a pronounced lip at the outer edge, visible scoring, or a pulsing pedal gets replaced, and rotors are cheap enough now that machining rarely makes sense.
If you do install new rotors, the job adds one step: the caliper bracket comes off, the old rotor slides free, and the new one gets a thorough cleaning with brake cleaner to strip the shipping oil before it touches the new pads. Skipping that degrease is the number one cause of contaminated pads and a soft first week of braking. Everything else about how to change brake pads stays exactly the same, and the bedding procedure at the end matters even more with fresh rotor surfaces.
One Caution: Rear Drums Are a Different Job
Everything in this guide on how to change brake pads covers disc brakes, which is what nearly every modern vehicle runs at least up front. If you pull a rear wheel and find a drum instead of a rotor and caliper, stop and get a guide for drum brakes specifically. Drums involve spring hardware under tension, an adjuster mechanism, and shoes that install in a specific orientation, and the disc-brake instincts you just built do not transfer. Plenty of trucks and economy cars still run rear drums, so check before you buy parts. The parts counter will ask anyway.
Bottom Line
How to change brake pads boils down to a first-hour wrenching skill with a professional-grade outcome, as long as you respect the details: jack stands always, nothing greasy on friction surfaces, torque specs on every bolt, and a firm pedal before the car moves an inch. Measure your pads before buying, do the job on a Saturday morning, and put the labor savings toward better pads than the shop would have installed.