IF IT GOES ... IT'S VEHICULAR
12 Easy Steps To Change your Alternator
12 Easy Steps To Change Your Alternator
If your battery warning light is on, your car is struggling to start, or your electrical systems are acting up, a failing alternator is often the culprit. The good news is that you can change your alternator at home with basic tools and a few hours of time. This guide walks you through every step so you can change your alternator with confidence.
Before you change your alternator, gather your tools: a socket wrench set, a serpentine belt tool or breaker bar, a voltmeter, and your vehicle’s repair manual. Having everything ready before you start makes the job much smoother. You can find the right replacement alternator for your vehicle online.
Step 1: Disconnect the Battery
Safety first. Before you change your alternator or touch anything under the hood:
- Turn the vehicle off completely.
- Open the hood and locate the battery.
- Identify the negative terminal (marked with a minus sign “-“).
- Use a wrench or socket to loosen the nut on the negative terminal.
- Lift the negative terminal off the battery post and move it away to prevent accidental reconnection.
Skipping this step risks electrical shock or damage to your vehicle’s electronics. Do not proceed until the battery is disconnected.

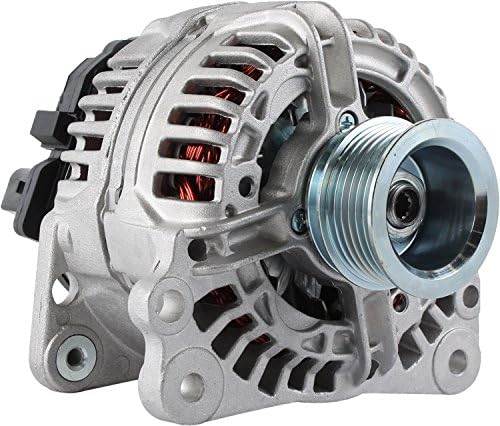
Step 2: Locate the Alternator
The alternator is mounted on the engine and connected to the serpentine belt via a pulley. It has a cylindrical shape with multiple electrical connections attached to it. Refer to your vehicle’s manual if you are unsure of its exact location, as placement varies by make and model.
Step 3: Remove the Serpentine Belt
- Find the belt routing diagram in your engine compartment before removing anything.
- Locate the tensioner pulley, which maintains tension on the belt.
- Use a serpentine belt tool or wrench on the tensioner pulley.
- Rotate the tensioner clockwise to release tension on the belt.
- Slide the belt off one pulley (smooth pulleys are easiest).
- Slowly release the tensioner back to its original position.
- Slide the belt completely off the remaining pulleys and set it aside.
Take a photo of the belt routing before removal if there is no diagram in the engine bay.
Step 4: Disconnect the Electrical Connections
- Locate the wiring harness and any other connectors on the alternator.
- Release the clip or locking mechanism and disconnect the wiring harness.
- Disconnect any additional connectors, such as sensor wires.
- Note or photograph the position of each connector for reassembly.
Step 5: Remove the Mounting Bolts
- Locate the mounting bolts securing the alternator to the engine bracket.
- Use a socket wrench to loosen and remove each bolt.
- Once all bolts are removed, carefully extract the alternator from the bracket. Take your time and avoid forcing it past surrounding components.
Step 6: Compare Alternators
Before you install the new one, hold the old and new alternators side by side. Check that the size, pulley position, and mounting points match exactly. If anything looks off, verify the part number before proceeding. Installing the wrong alternator is a common and costly mistake when people change their alternator without double-checking the part first.

Step 7: Install the New Alternator
- Position the new alternator into the mounting bracket, aligning it with the mounting points.
- Insert and hand-tighten the mounting bolts first to make sure everything is aligned.
- Torque the bolts to the specification in your vehicle’s manual.
Step 8: Reconnect the Electrical Connections
- Reconnect the wiring harness to the new alternator and make sure it clicks into place.
- Reconnect any additional connectors such as sensor wires, matching the positions you noted earlier.
Step 9: Reinstall the Serpentine Belt
- Route the belt according to the diagram in the engine compartment.
- Place the belt on the alternator pulley first.
- Work the belt onto the remaining pulleys, leaving the tensioner pulley for last.
Step 10: Tension the Belt
- Use the serpentine belt tool on the tensioner pulley.
- Rotate the tensioner clockwise to create slack.
- Slide the belt onto the last pulley.
- Slowly release the tensioner to apply proper tension to the belt.
- Visually confirm the belt is seated correctly on all pulleys before moving on.
Step 11: Reconnect the Battery
Reconnect the negative terminal to the battery post and tighten the nut securely. A loose connection here will cause problems even after you change your alternator successfully.
Step 12: Test the Alternator
- Start the vehicle and let it run for a few minutes.
- Listen for any unusual noises from the alternator or belt area.
- Use a voltmeter to check the voltage across the battery terminals. A properly functioning alternator should read between 13.5 and 14.5 volts with the engine running.
- If the voltage is within range and there are no warning lights, you have successfully managed to change your alternator.
A Few Final Notes
When you change your alternator, always use a quality replacement part. Remanufactured alternators are a cost-effective option but verify that they come with a warranty. Cheap no-name units can fail quickly and put you right back where you started.
If after following these steps your battery light is still on or the voltage reading is outside the normal range, the issue may not have been the alternator alone. A failing battery, bad wiring, or a faulty voltage regulator can all produce similar symptoms.
If you are not comfortable doing this job yourself, there is no shame in taking it to a shop. But for those willing to change their alternator at home, this is one of the more satisfying DIY repairs you can complete in a single afternoon.